指纹提取与分析 
约 905 个字 130 行代码 4 张图片 预计阅读时间 5 分钟
Abstract
无线与物联网安全 lab2 实验报告(实验中使用指纹非本人指纹)
仅供学习参考,请勿抄袭
实验过程 
安装 mindtct 
首先配置好 cmake 环境,然后执行:
这里不能直接写 . 不然在后面 make install 的时候目标路径就都是相对路径导致拷贝失败。
接着进行编译即可:
在 make it 的时候下发的代码中包含 histo_head 重定义的错误,可以通过助教提供的 https://aur.archlinux.org/cgit/aur.git/tree/0000-use-extern-header-an2k.patch?h=nbis 将 an2k/include/histogen.h 和 an2k/src/bin/bistogen/chkfile.c 文件进行修改。同时我也找到了 https://github.com/NoahGWood/OpenEFT/discussions/17,可以使用 https://github.com/OwenPemberton/nbis 这里的源码,版本同样为 v5.0.0,只是在 makefile 中添加了 -fcommon 编译选项来解决重定义问题。
mindtct 提取指纹 
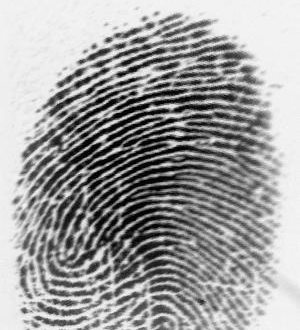
通过 help 知道可以通过以下命令来提取 finger.jpg 中的指纹数据到 finger 开头的文件:
但这时会报错:
所以要先将指纹图片改为八位灰阶图:
再运行 mindtct 就可以得到以下文件:
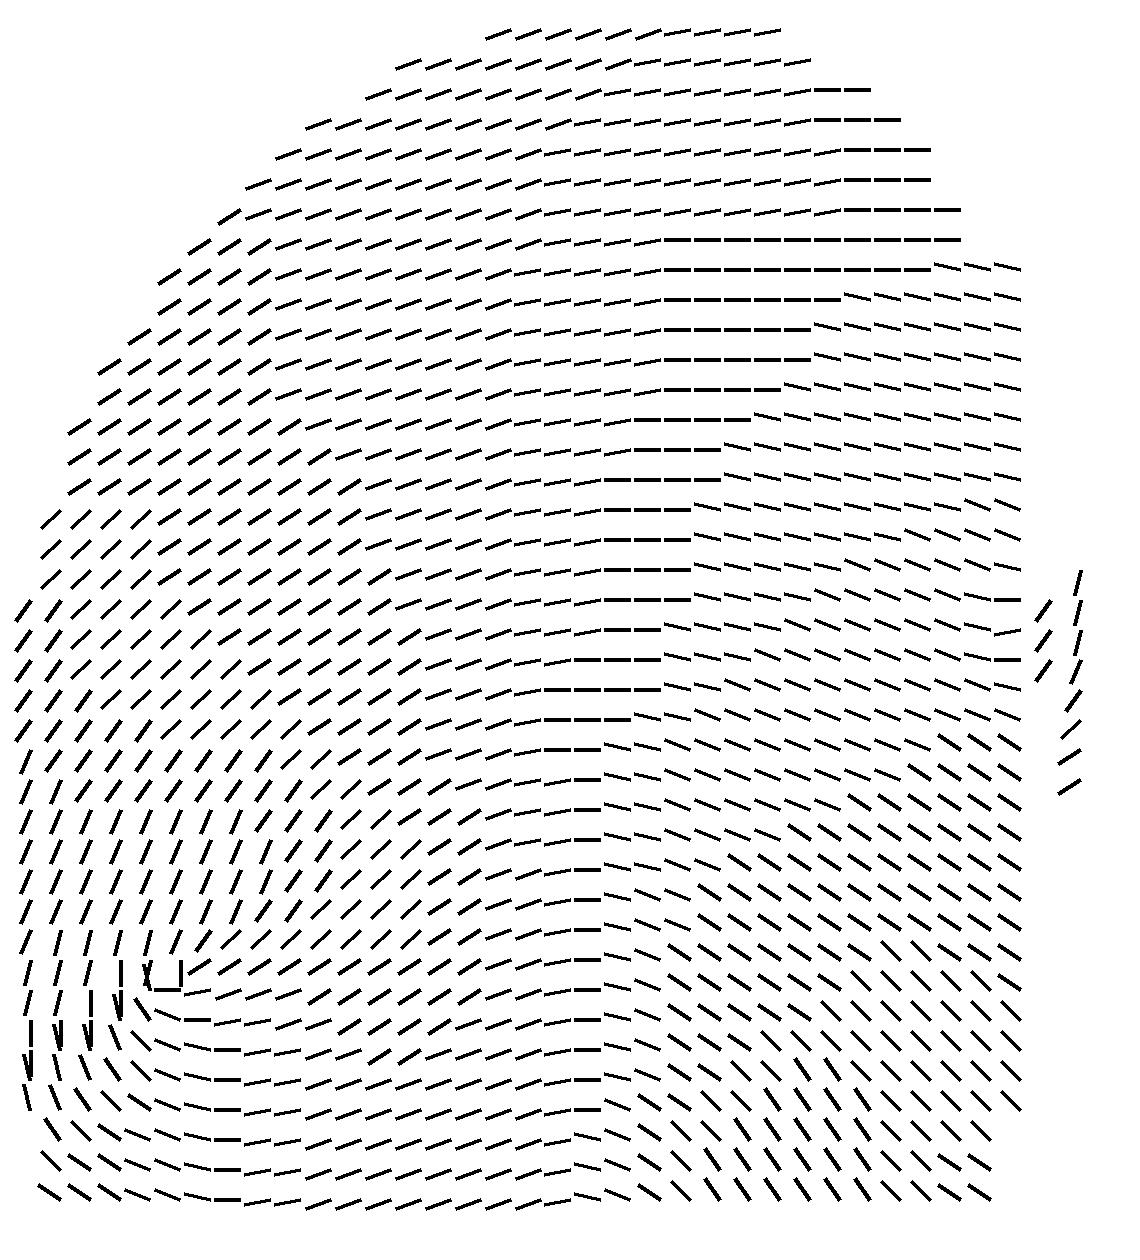
生成指纹方向场图像 
向量场数据输出在 finger.dm 中,是矩阵形式的,可以直接通过 np.loadtxt 导入,然后根据元素位置上的值除以 16 占 180 度的比例来计算角度,再通过 PIL.ImageDraw.Draw.line 画出线条:
from PIL import Image, ImageDraw
import numpy as np

dm = np.loadtxt("data/finger.dm")

UNIT = 30
vector_image = Image.new("L", (dm.shape[1] * UNIT, dm.shape[0] * UNIT), 255)
draw = ImageDraw.Draw(vector_image)

for y in range(dm.shape[0]):
    for x in range(dm.shape[1]):
        if dm[y, x] == -1:
            continue
        angle = dm[y, x] / 16 * 180 + 90
        sx = x * UNIT
        sy = y * UNIT
        ex = sx + np.cos(np.radians(angle)) * (UNIT - 4)
        ey = sy + np.sin(np.radians(angle)) * (UNIT - 4)
        draw.line((sx, sy, ex, ey), fill=0, width=4)

# vector_image.show()
vector_image.save("finger_vector.jpg")
得到图片结果如下:
在原始指纹图像上标注特征点 
特征点数据在 finger.xyt 文件中,每行前三个值分别表示一个特征点的 xy 坐标和方向,通过空格分隔。实测此处的坐标是上下翻转的,所以要用图片 height 减去 y 坐标得到绘图的 y 坐标,并对角度取相反数。然后利用 PIL.ImageDraw.Draw.rectangle 和 line 即可画出特征点位置以及方向信息:
img = Image.open("finger.png")
img_draw = ImageDraw.Draw(img)
data = [list(map(int, line.strip().split()))[:-1] for line in open("data/finger.xyt")]

for x, y, t in data:
    y = img.height - y
    t = -t
    img_draw.rectangle((x - 2, y - 2, x + 2, y + 2), outline=(255, 0, 0), width=1)
    ex = int(x + np.cos(np.radians(t)) * 10)
    ey = int(y + np.sin(np.radians(t)) * 10)
    img_draw.line((x, y, ex, ey), fill=(0, 0, 255), width=1)

# img.show()
img.save("finger_minutiae.jpg")
得到图片结果如下:

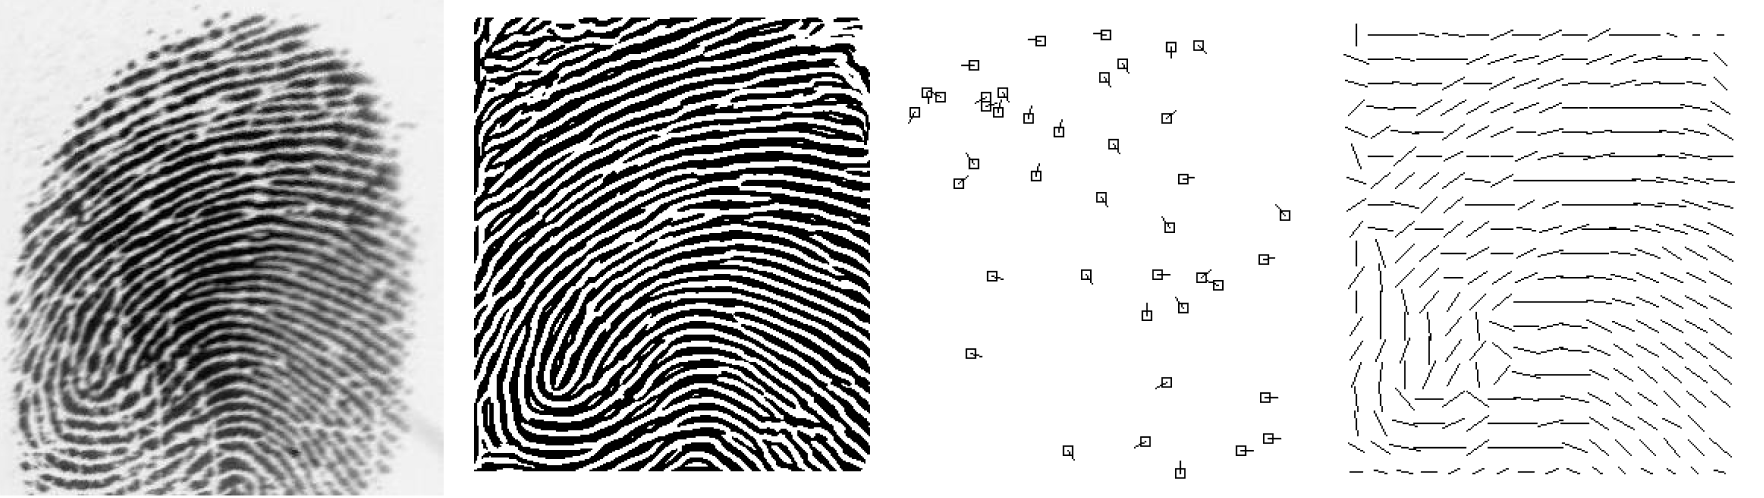
运行 code/FingerprintExtraction 
先安装依赖:
然后将 finger_L.jpg 放入 inputimages 文件夹中,运行:
得到 outputimages 中结果(enhanced、minutiae、orient
问题回答 
指纹方向场提取过程 
指纹方向场提取的代码在 levelOneExtraction.py 中的 findOrientationPhase 函数以及 findOrient 函数中,主要过程为:
- 将输入图像切成 16x16 的小块,对每块进行 findOrient
- findOrient 计算每块中的指纹方向
- 计算每个像素点的梯度,并累加到 numerator 和 denominator 中
- 计算 theta,如果 theta 大于 0 则减去 np.pi / 2,再加上 np.pi
- 计算 percent,为 1 减去非零像素点数除以总像素点数
- 如果 theta 等于 np.pi,则将图像旋转 90 度,再次计算 theta
- 返回 theta 和 percent
- 将每块的 theta 和 percent 进行调整,拼接到一起,得到整体的指纹方向场
def findOrient(img):
    numerator = 0
    denominator = 0
    for y in range(1, img.shape[0]):
        for x in range(1, img.shape[1]):
            bx1, bx2 = img[y, x], img[y, x - 1]
            by1, by2 = img[y, x], img[y - 1, x]
            gx = int(bx1) - int(bx2)
            gy = int(by1) - int(by2)
            numerator += (2 * gx * gy)
            denominator += (math.pow(gx, 2) - math.pow(gy, 2))
    percent = 0
    theta = np.pi
    if denominator != 0.00000000:
        base = numerator / denominator
        theta = .5 * np.arctan(base)
        if theta > 0:
            theta -= np.pi / 2
        theta += np.pi
        percent = 1 - (np.count_nonzero(img) / (img.shape[0] * img.shape[1]))
        if theta == np.pi:
            img2 = np.rot90(img)
            numerator = 0
            denominator = 0
            for y in range(1, img2.shape[0]):
                for x in range(1, img2.shape[1]):
                    bx1, bx2 = img2[y, x], img2[y, x - 1]
                    by1, by2 = img2[y, x], img2[y - 1, x]
                    gx = bx1 - bx2
                    gy = by1 - by2
                    numerator += (2 * gx * gy)
                    denominator += (math.pow(gx, 2) - math.pow(gy, 2))
            theta = np.pi
            if denominator != 0.00000000:
                base = numerator / denominator
                theta = .5 * np.arctan(base)
                if theta > 0:
                    theta -= np.pi / 2
                theta += np.pi
                theta += np.pi / 2
    return theta, 2 * percent
指纹脊线频率提取过程 
脊线频率图提取的相关代码在同一文件中的 findRidgeFlowCount 函数和 getRidgeCount 函数中,主要过程为:
- 将输入图像切成 16x16 的小块,对每块进行 getRidgeCount
- getRidgeCount 计算每块中的脊线频率
- 将每块旋转到指纹方向,再裁剪到 16x16 大小
- 对裁剪后的图像进行二值化,然后统计每行的黑白块数量
- 计算每行的黑块数量,得到脊线频率
- 对每块的 count 进行拼接,得到整体的脊线频率图
def getRidgeCount(img, center, orientation):
    ridges = []
    ridgeCount = 0
    x, y = center
    angle, strength = orientation
    theta = angle / 2 / np.pi * 360
    block = img[max(y - 16, 0):min(y + 16, img.shape[0]), max(x - 16, 0):min(x + 16, img.shape[1])]
    if block.shape[0] == 32 and block.shape[1] == 32:
        rotated = imutils.rotate(block, theta)
        rotatedCrop = rotated[:, 4:20]
        rotatedCrop = np.rot90(rotatedCrop)
        res, rotatedCrop = cv2.threshold(rotatedCrop, 127, 255, cv2.THRESH_BINARY)
        for y in range(rotatedCrop.shape[0]):
            if np.count_nonzero(rotatedCrop[y, :]) < 32:
                blk = []
                wte = []
                current = rotatedCrop[y, 0]
                count = 1
                for x in range(1, rotatedCrop.shape[1]):
                    if current == rotatedCrop[y, x]:
                        count += 1
                    else:
                        if current == 0:
                            blk.append(count)
                            count = 1
                            current = 255
                        else:
                            wte.append(count)
                            count = 1
                            current = 0
                ridges.append(len(blk))
        if len(ridges) > 0:
            ridgeCount = sum(ridges) / len(ridges)
        if ridgeCount % 1 >= .5:
            ridgeCount = int(ridgeCount) + 1
        else:
            ridgeCount = int(ridgeCount)
    return ridgeCount
Python 代码中指纹提取用了什么滤波器?
在输出到 _enhanced 结尾的图片时,调用了 imageFilter1 函数进行滤波,其还调用了 FingerprintEnhancement 中的 main_enhancement 函数,其中用到的滤波器有:
- 均值滤波器:
res = cv2.filter2D(res, -1, kernel) - 高斯滤波器:
res = cv2.GaussianBlur(res, (5, 5), 0) - Gabor 滤波器:在 FingerprintEnhancement/ridge_filter.py 中实现,在 image_enhance.py 中调用: